
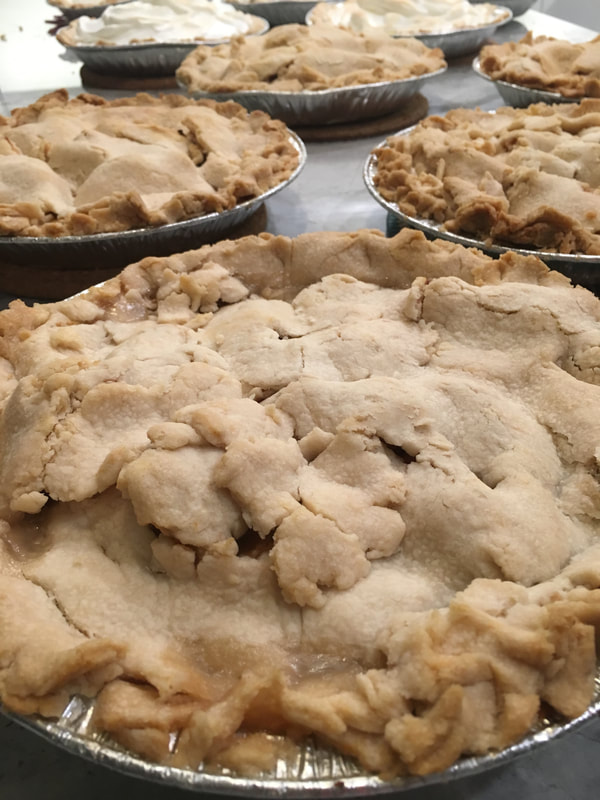
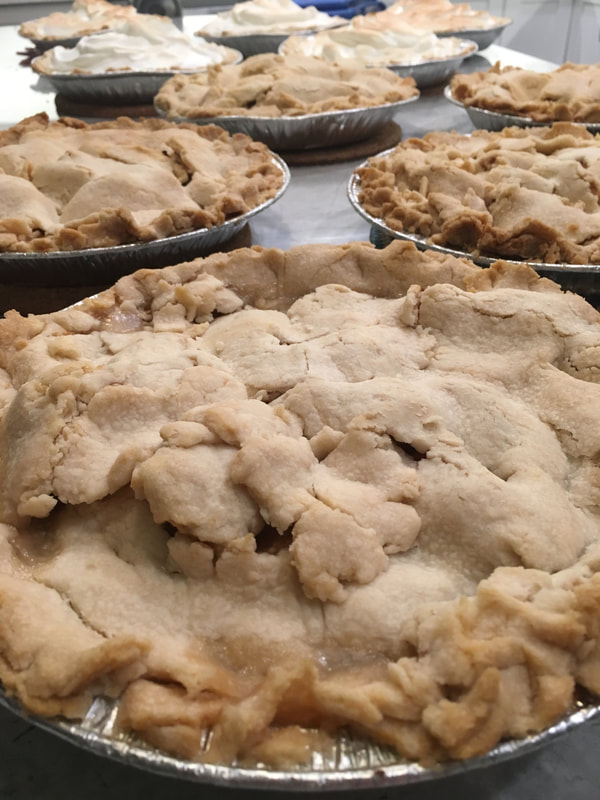
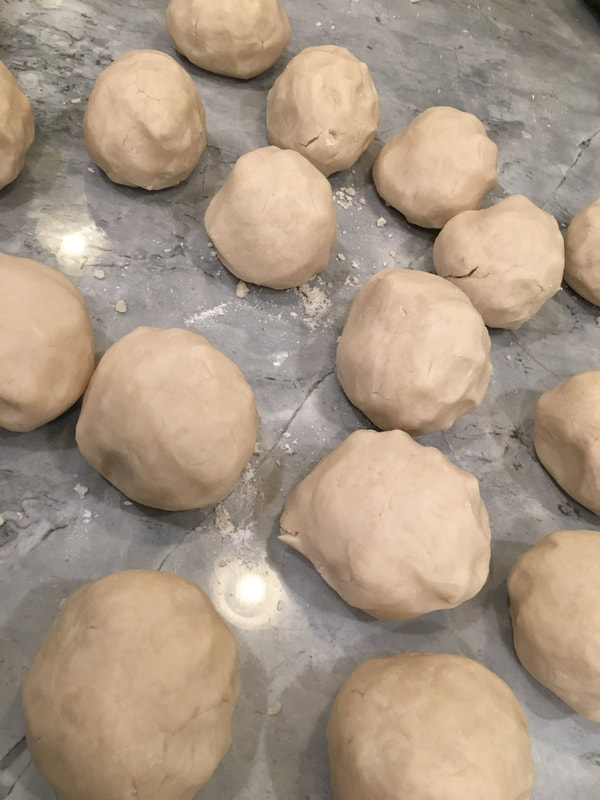
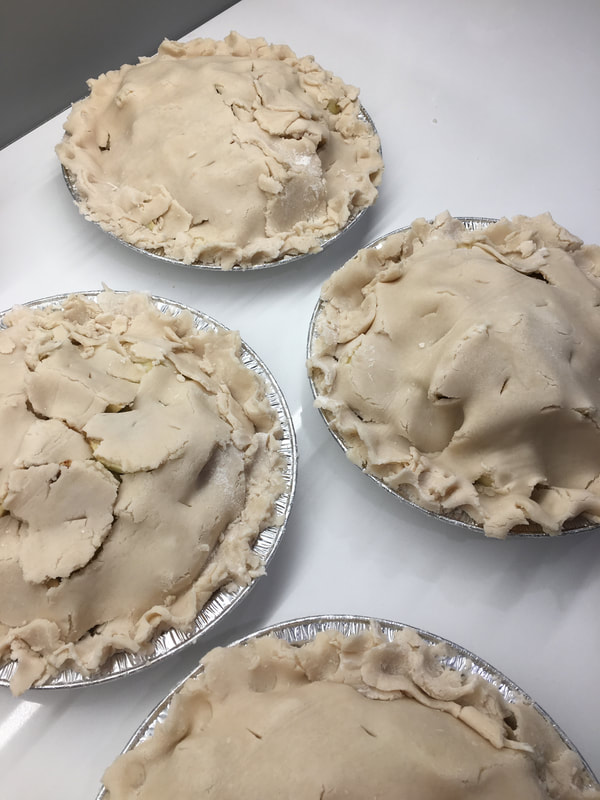
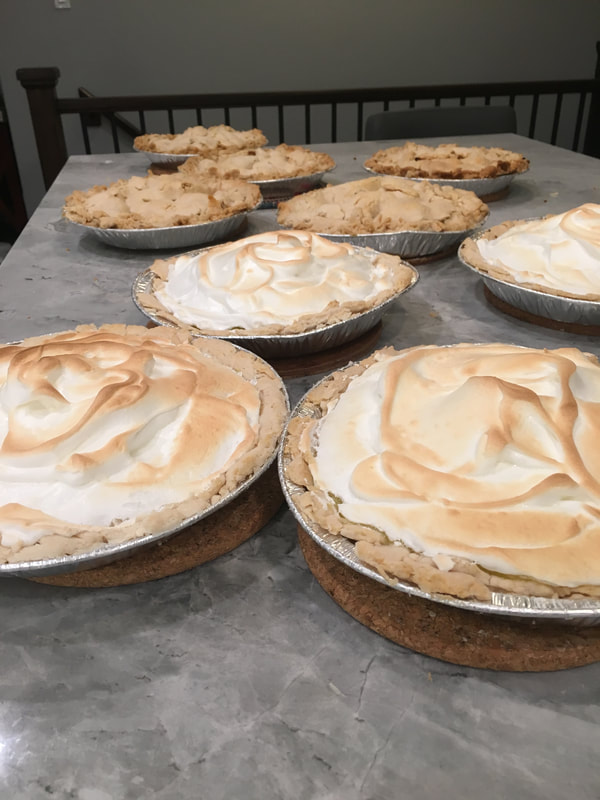
With my eldest daughter's help we produced ten homemade pies on a Friday night. Earlier that day my daughter texted me and said, "hey any chance we could make pies tonight, like five apple and five lemon meringue, LOL?" She really did add the LOL but she wasn't joking.
She wanted to celebrate her boyfriend's birthday by gifting him his favourite pie(s). OK, but ten of them?! It just so happens he's in a program right now and it wouldn't go over to drop a pie off for just him and not the rest of the guys, so ten pies it would be!
This recipe has been handed down to me from my mom, who learned it from her mom, my Nan. Not sure if my great-nan also made apple pie, but it's truly the best tasting apple pie ever!
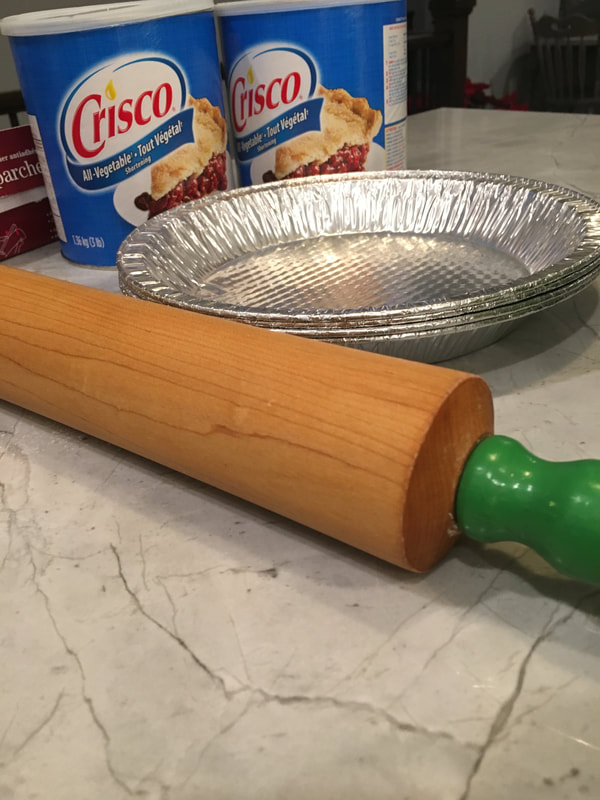
Pie crust does take a little trial and error to get it right. So be patient, it's worth it. The exact measurements are not the whole of it either. There is a certain feel or consistency, not too wet or greasy but not too dry or tough. You want to add the right amount of "Crisco" (a must) and use a pastry cutter until you have the Crisco somewhat incorporated. You want the flour and Crisco to almost come together. It's at that stage that you add some milk to bind it and form nice evenly shaped balls of pastry.
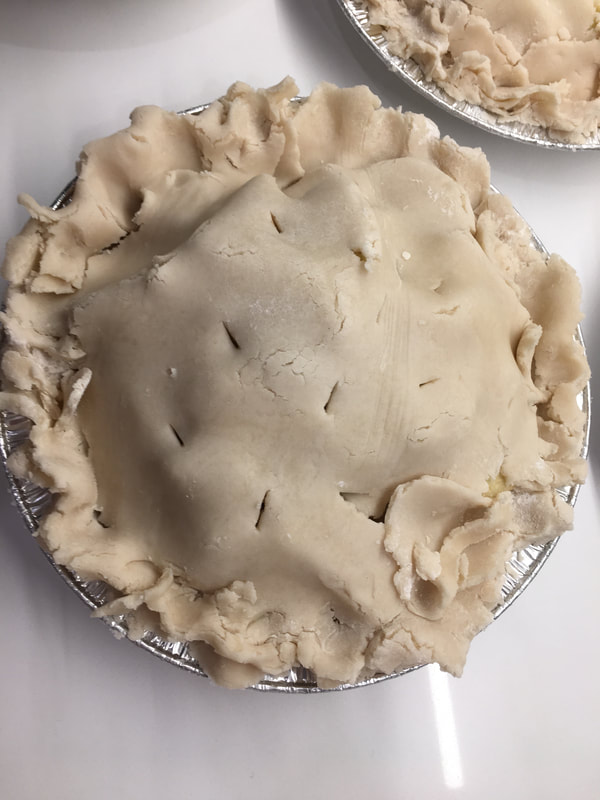
If you're looking for a pie crust that won't crumble and is guaranteed to hold it's shape, then this is NOT the one for you. If, however, you're looking for a crust that compliments the apple filling and almost melts in your mouth, then this is it! It won't win an award for presentation but it will most definitely reward your taste buds. This crust pairs best with MacIntosh apples and is the only apple I use for apple pie.
Apple Pies.s.s.s.s
Recipe credit "My Mom" and her mom before that! Thanks mom for passing it on.
INGREDIENTS
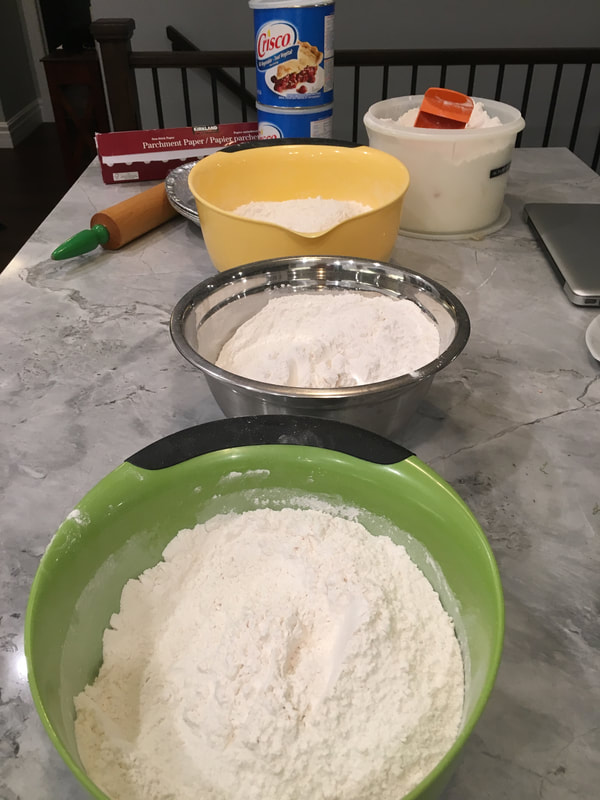
Makes Two Pie Crusts 2 cups flour 1 tsp baking powder 1 cup Crisco shortening (and yes it HAS to be Crisco) a dash of salt 1/4 - 1/2 cup Milk
DIRECTIONS
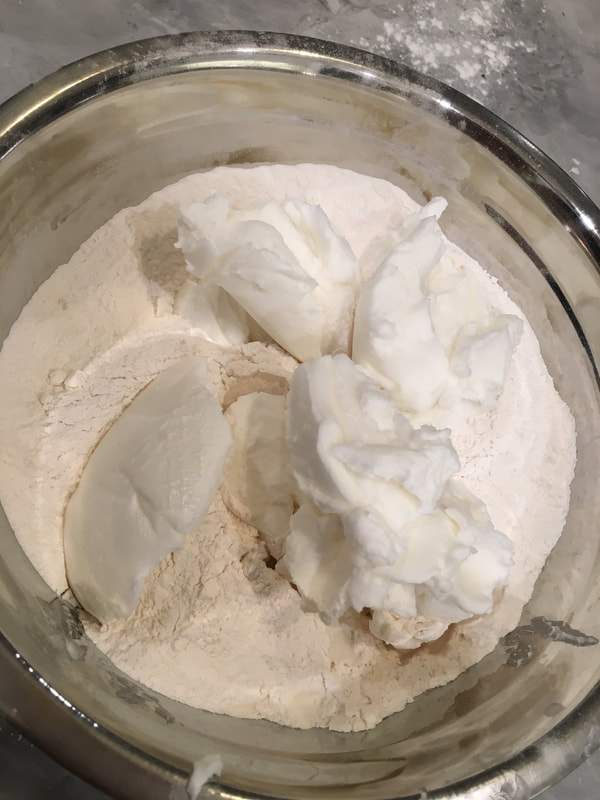
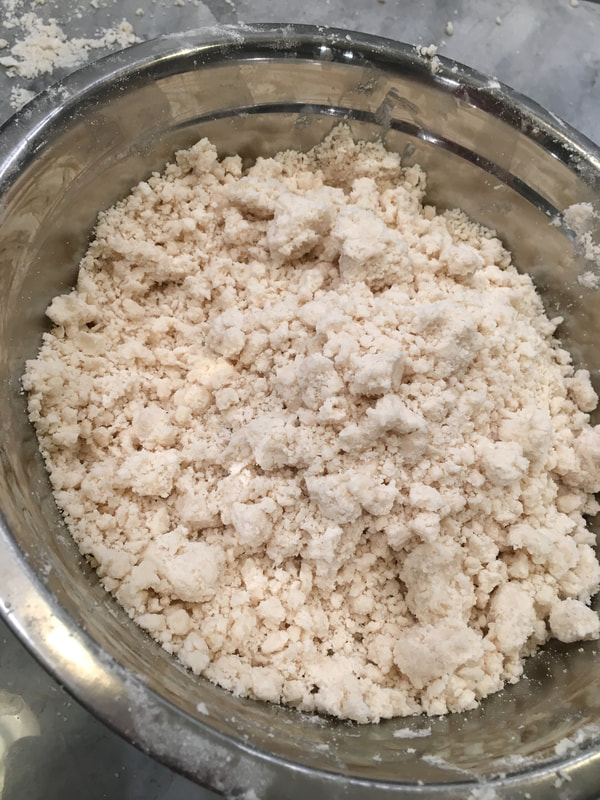
Add flour, tsp of baking powder and a dash of salt to a fairly large bowl, mix. Scatter 1 cup of Crisco over flour mixture. Using a pastry cutter, incorporate flour and Crisco until large crumbs form. At this stage you can "almost" form a ball of pastry, but it just needs a little extra moisture. Drizzle about a 1/4 cup of milk evenly over mixture. Using your hands bring it all together. If the pastry easily draws together into a nice soft ball, congratulations, you're done. If not, add a little more milk until it all comes together nicely. You're going to need to get your hands in there and work the mixture but you don't want to overdue it. Mixing too long and too much can cause the pastry to become tough. Mix just enough to bring it together into a nice round ball of pastry. Now you can divide it into two equal sized balls. Rolling it out: This particular pastry tends to break easily. I always use parchment paper to roll it out. I use a dishcloth to moisten my counter top, then I place my parchment paper down. This helps it to stay in place when rolling. Add some flour to the top of the parchment before putting your pastry ball down. Use your hands to semi-flatten your pastry, then add some more flour on top of the pastry and cover with another piece of parchment. Now you're ready to roll out your pastry. Always start from the centre and roll outwards. Make sure you rollout past the edges. You want to get as even a crust as possible. Once you've rolled it out so that it's large enough to fit your pie plate, your ready for the flip! Some crusts can be rolled around a rolling pin but not this one. I just bring my pie plate as close to one edge of the crust as possible and then I "quickly" flip the crust into and onto the pie plate. Don't worry if it breaks, it most likely will. Just piece it together as best you can. Now it's time to top your pie with whatever fruit you're using. I always sprinkle about a tsp of flour on the bottom to help thicken the juice from the fruit. If making an apple pie, I highly recommend using MacIntosh apples. Again, they might not be the best apple for presentation, but you can't beat the taste. Slice your apples and fill the pie plate, add sugar (depends on tartness of apple - you might want to test that). I usually put about 1/2 cup of sugar. Continue to pile nice and high with more apple slices. Add another 1/2 cup of sugar and about a tsp of cinnamon. Roll out your pastry ball and "flip" onto the top of your pie. Cut off any excess overhang and crimp edges together. Cut a few slats in the top of the crust, for steam to exit. No egg or sugar needed on this pie crust. Just leave it as it is. Baking: It's a good idea to put a large rimmed cookie sheet under the pie, with some tin foil to catch the pie drippings. The pie will take at least an hour at 350 degrees to cook. My mom always said it was ready once it started to drip. You may need to cover it with tin foil if the edges begin to brown before the pie is ready. Once it begins to drip, take it out and let it cool. Make sure you dig into it while it's still warm, paired with vanilla ice cream.
0 Comments
Leave a Reply. |

Terri MazikAll things cooking, from simple and clean to gourmet and exotic (and everything in between) have been my passion for over 30 years. Since discovering Pinterest, I pretty much exclusively cook from the recipes I PIN. My saying is, "if you can PIN it, you can cook it". I love to PIN recipes and I love to cook. I thought, why not blog the recipes I make from my Pinterest food boards. I'm the self-declared, Pincook. Categories
All
Archives
August 2021
|
 RSS Feed
